Use Rkill to terminate malicious processes running on the computer.
Check for and uninstall any unknown or suspicious programs from the computer via Windows Settings.
Use the Windows Command Prompt as Administrator to remove malicious policies set by the malware.
Manually search for and delete malicious scheduled tasks and folders located in the AppData\Roaming and AppData\Local directories. Also clean up malicious Chrome browser extensions and shortcut modifications.
Reset your web browser settings to their defaults to remove spam notifications, malicious extensions, and revert any settings changed by the malware.
Run a full system scan with Malwarebytes anti-malware to detect and remove any trojans, browser hijackers, and other malware on the computer.
Perform an additional scan with HitmanPro to check for any rootkits and remaining malicious programs. Activate the free 30-day trial to enable clean up if needed.
Use AdwCleaner to remove adware and reset malicious Chrome policies that may have been set by browser hijackers.
Restart the computer when all the scans and removal steps are complete.
Consider using a comprehensive real-time anti-malware tool like Malwarebytes Premium to proactively protect the system going forward. Also follow general online safety best practices.
What Is Webcord Adware?
Webcord is a type of adware that first appeared in early 2021, causing considerable disruption by embedding itself within free software downloads or through deceptive online advertising (Fabotix) (espressocoder).
Functional Impact of Webcord Adware: Once installed, Webcord aggressively displays pop-up ads, banners, and notifications across various websites. The ads typically promote questionable products and services. Beyond merely displaying ads, Webcord also:
Redirects user searches to affiliate websites, thus generating ad revenue for its operators.
Gathers detailed browsing data and search histories to deliver more personalized and targeted advertisements.
Consumes significant system resources to display these ads, which can slow down the infected computer significantly.
Installs further unwanted programs or browser extensions without the user’s consent (Fabotix) (soflacil).
Persistence and Removal Challenges: Webcord adware is notably resilient and employs various tactics to ensure its persistence on an infected system. It may alter web browser settings, modify system registry entries, or establish scheduled tasks to reassert itself after attempted removals. This makes Webcord particularly hard to eliminate (soflacil).
Risks Associated with Webcord: While not as harmful as viruses or ransomware, Webcord still poses significant privacy and security risks. It compromises user privacy by tracking online activities and can serve as a conduit for more severe malware threats if it installs other malicious software. The presence of Webcord indicates a breach in computer security (MUX MAGAZINE).
Preventative Measures and Removal Advice: To avoid Webcord infections, users should:
Refrain from downloading software from unreliable sources.
Be wary of unexpected installation prompts.
Regularly update their operating system and applications to patch vulnerabilities.
Maintain an effective anti-malware program to detect and prevent infections (Next Tribune).
If a system becomes infected with Webcord, removing it promptly with trusted security software is crucial. Manual cleanup might also be necessary to revert any changes made by the adware to the system settings (rideable).
Why Webcord is Problematic:
It disrupts normal browsing activities with continuous ad interruptions.
It redirects web searches and traffic to generate affiliate income.
It invades privacy by tracking user activities and collecting data.
It diminishes system performance due to its background activities.
It heightens the risk of further malware infections through additional unwanted software installations (MUX MAGAZINE) (Rubblemagazine).
For individuals and organizations alike, understanding the nature of Webcord and taking appropriate actions to mitigate its effects are key steps in maintaining digital security and privacy.
Table of Contents
Step 1: Use Rkill to Terminate Malicious Processes
Rkill is a powerful utility designed to terminate known malicious processes, enabling your anti-malware software to effectively detect and remove threats. By running Rkill before proceeding with the removal process, you can ensure that malicious processes do not interfere with the cleaning operation.
Click on the “Download Now” button next to “iExplore.exe” to download the renamed version of Rkill. Using a renamed version helps avoid detection by malware that may attempt to block the utility.
Download RKill from Bleeping Computers
B. Run Rkill
Locate the downloaded “iExplore.exe” file, typically found in your Downloads folder.
Double-click on “iExplore.exe” to run Rkill. The utility will begin terminating known malicious processes.
Wait for Rkill to complete its operation. The process may take several minutes, during which you may observe a black command prompt window rapidly opening and closing.
Once Rkill has finished running, it will generate a log file named “rkill.log” in the same directory as the “iExplore.exe” file. This log file contains information about the terminated processes.
After running Rkill, do not restart your computer. Proceed directly to the next step in the removal process to ensure that the malware does not have a chance to reactivate itself.
Step 2: Uninstall malicious programs
To remove any malicious programs associated with the virus, you need to access the Apps & Features section in the Windows Settings app and uninstall any suspicious applications.
A. Access Apps & Features in Windows Settings
Open the Windows Settings app by pressing the Windows key + I on your keyboard or by clicking on the Start menu and selecting the gear icon.
In the Windows Settings app, click on “Apps” to access the Apps & Features section.
B. Identify and uninstall suspicious programs
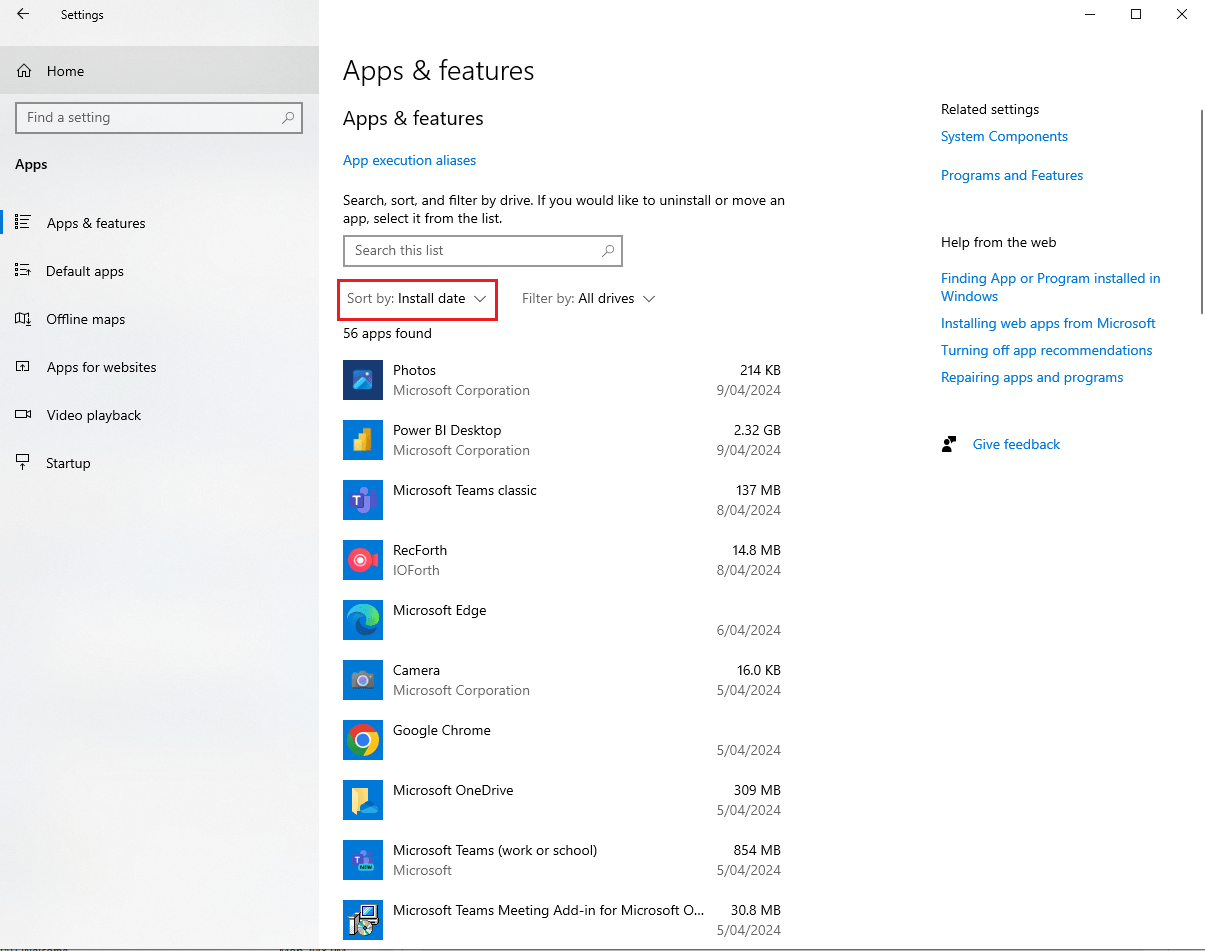
In the Apps & Features section, sort the list of installed programs by clicking on the “Sort by” dropdown menu and selecting “Install date.” This will help you identify recently installed suspicious programs that may be associated with the Trojan.
Carefully review the list of installed programs, looking for any unfamiliar or suspicious entries. Common red flags include:
Unusual or random program names
Programs with generic descriptions or no publisher information
Programs installed on dates coinciding with the suspected Trojan infection
If you identify a suspicious program, click on it to expand the entry and reveal the “Uninstall” button.
Click “Uninstall” and follow the on-screen prompts to remove the program from your system. Repeat this process for any other suspicious programs you find.
If you are unsure about a program’s legitimacy, research its name online to determine whether it is a known malware or a legitimate application. When in doubt, it’s best to err on the side of caution and remove the program.
After uninstalling all suspicious programs, proceed to the next step in the removal process.
Step 3: Remove malicious browser policies using Command Prompt
Malicious browser policies installed by the virus can persist even after uninstalling the malware. To remove these policies, you need to run a series of commands in the Command Prompt with administrative privileges.
A. Open Command Prompt as Administrator
Press the Windows key + R to open the Run dialog box.
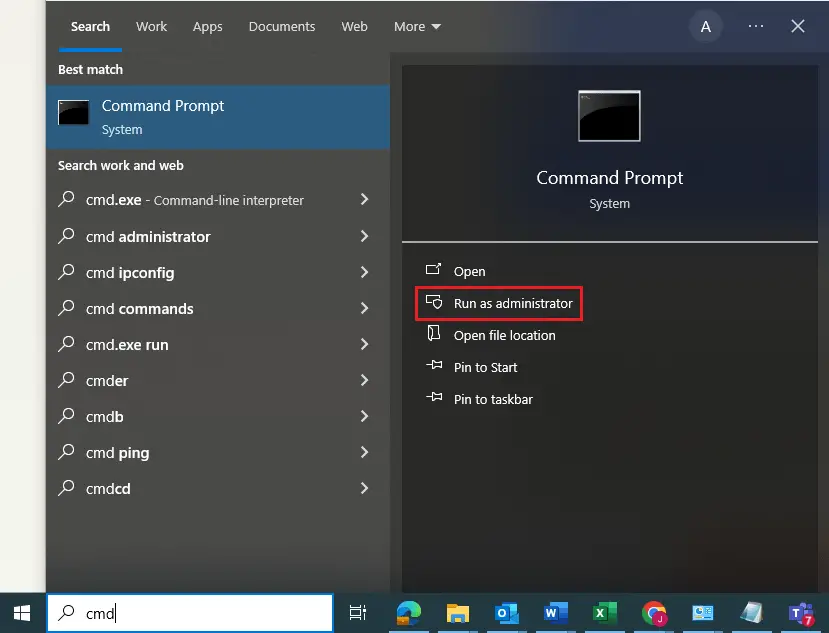
Type “cmd” into the Run dialog box and press Ctrl + Shift + Enter to open the Command Prompt with administrative privileges.
If prompted by the User Account Control (UAC), click “Yes” to allow the Command Prompt to make changes to your device.
B. Run commands to remove malicious policies
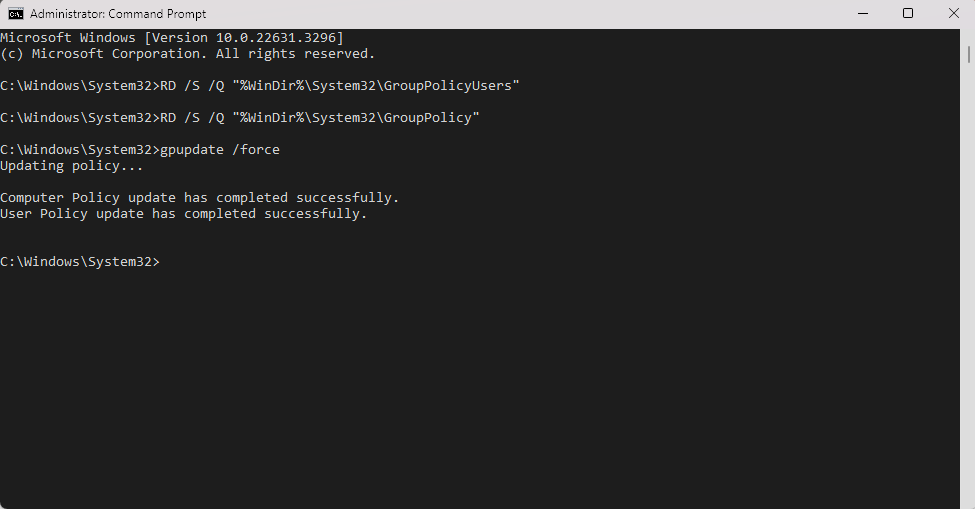
In the Command Prompt window, type the following commands, pressing Enter after each line:
After executing the commands, you should see a confirmation message indicating that the Group Policy update was successful.
Close the Command Prompt window and proceed to the next step in the removal process.
Please note that modifying Group Policy settings can have unintended consequences if done incorrectly. If you are unsure about running these commands, consult with a professional or seek further guidance from a reputable source.
Step 4: Remove malicious files and folders
The virus may create malicious scheduled tasks and store harmful files in various locations on your system, such as the AppData\Roaming and AppData\Local folders. It may also modify Chrome shortcuts to execute malicious code. To remove these elements, follow the steps below.
A. Delete malicious scheduled tasks
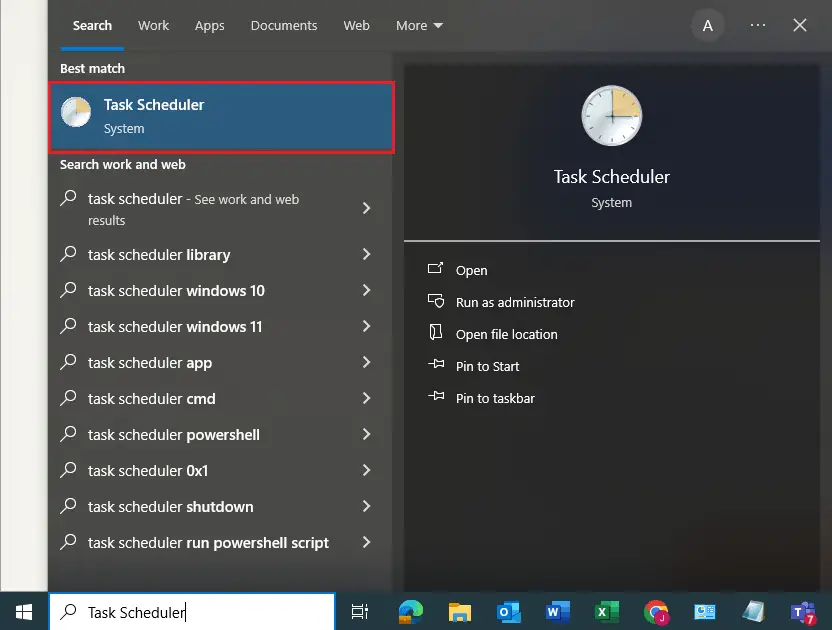
Open the Task Scheduler by pressing the Windows key, typing “Task Scheduler,” and clicking on the app in the search results.
In the Task Scheduler, navigate to the “Task Scheduler Library” section in the left pane.
Review the list of scheduled tasks, looking for any suspicious entries, such as those with random names or pointing to unusual file locations.
If you identify a malicious task, right-click on it and select “Delete” to remove it from your system.
B. Delete malicious files in AppData\Roaming
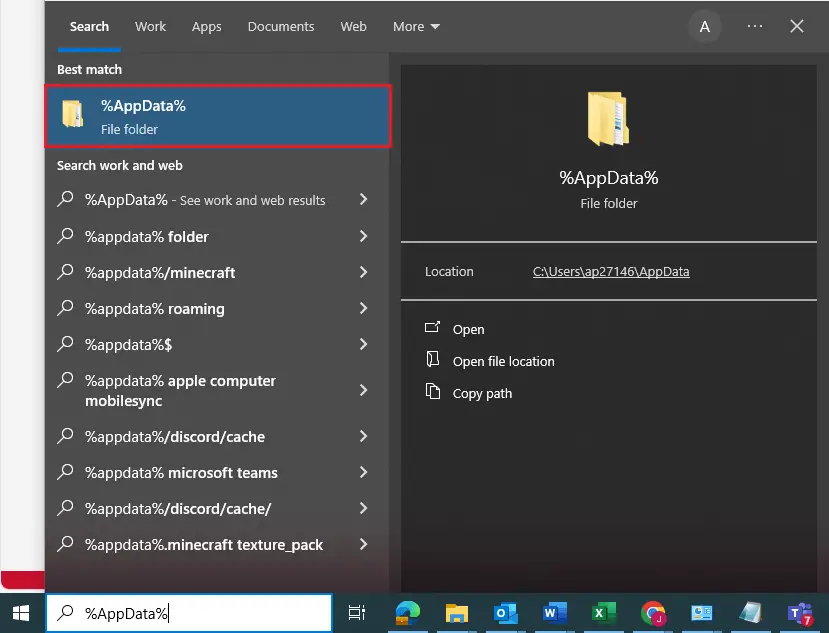
Press the Windows key + R to open the Run dialog box.
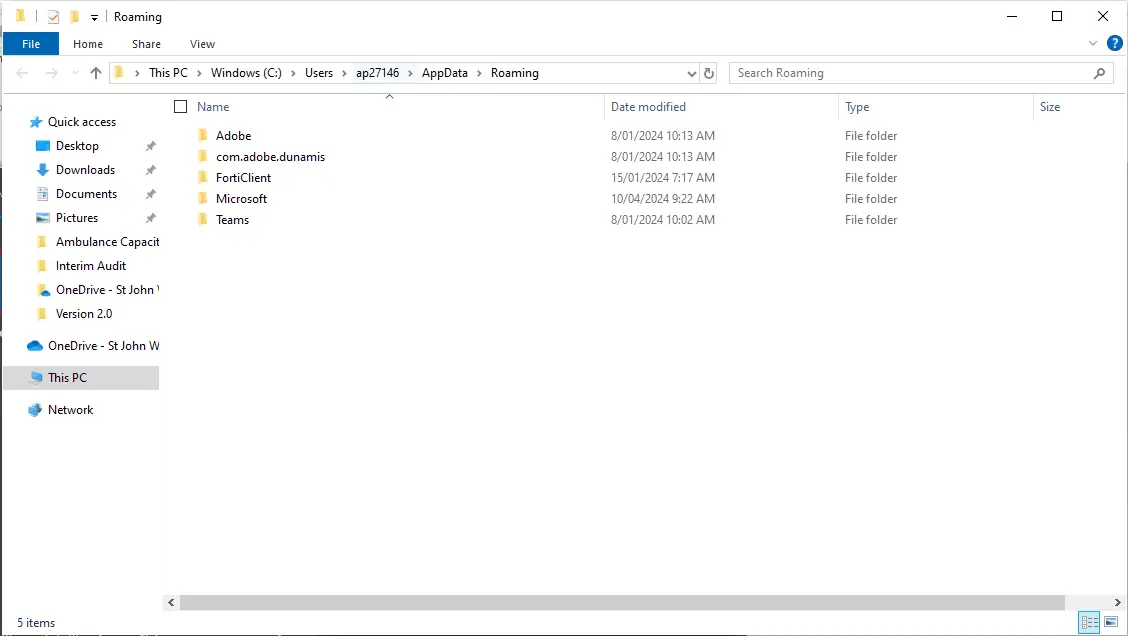
Type “%AppData%” into the Run dialog box and press Enter to open the AppData\Roaming folder.
In the AppData\Roaming folder, look for any suspicious files or folders, such as those with random names or recently created.
If you find any malicious files or folders, right-click on them and select “Delete” to remove them from your system.
C. Delete malicious files in AppData\Local
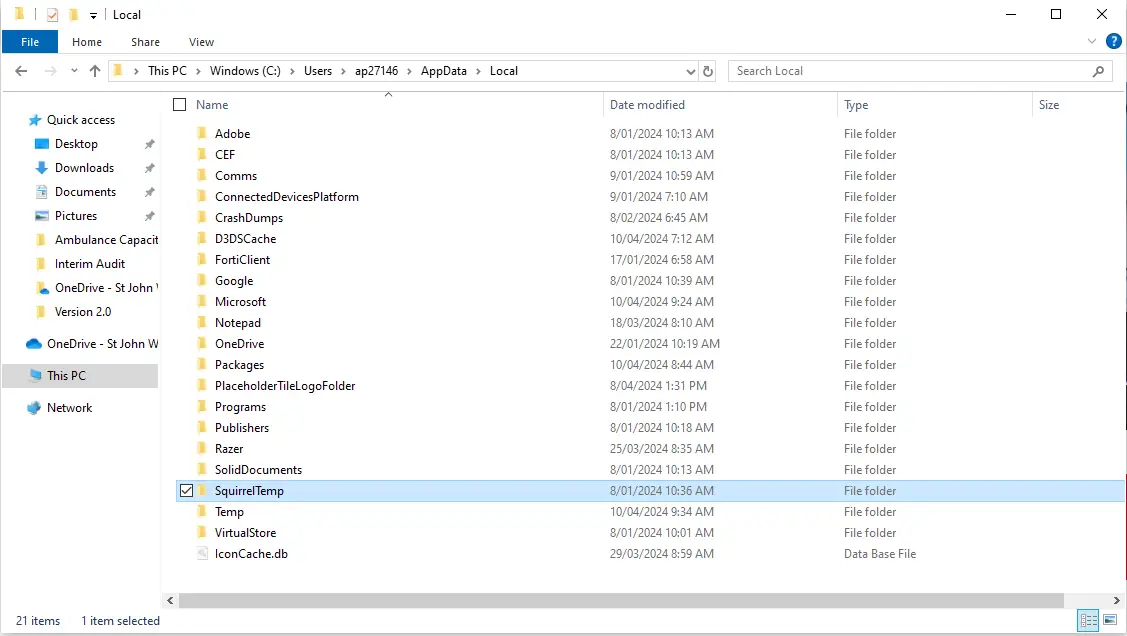
Press the Windows key + R to open the Run dialog box.
Type “%LocalAppData%” into the Run dialog box and press Enter to open the AppData\Local folder.
In the AppData\Local folder, look for any suspicious files or folders, paying special attention to the Google\Chrome\User Data\Default\Extensions directory, where malicious extensions may be stored.
If you find any malicious files or extensions, right-click on them and select “Delete” to remove them from your system.
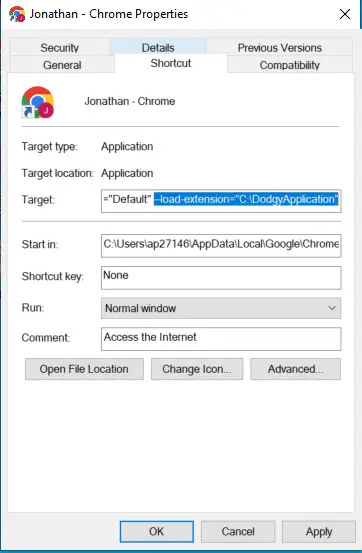
D. Remove Chrome shortcut modification
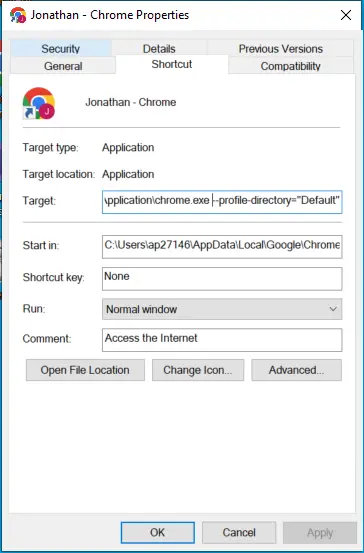
Right-click on the Google Chrome shortcut on your desktop or in the Start menu and select “Properties.”
In the Properties window, go to the “Shortcut” tab and examine the “Target” field.
If you see any suspicious text appended to the target path, such as “–load-extension=…” followed by a random directory, delete this portion of the text, leaving only the path to the Chrome executable (e.g., “C:\Program Files\Google\Chrome\Application\chrome.exe”).
Click “Apply” and then “OK” to save the changes to the Chrome shortcut.
For Mozilla Firefox:
Right-click on the Mozilla Firefox shortcut on your desktop or in the Start menu and select “Properties.”
In the Properties window, go to the “Shortcut” tab and examine the “Target” field.
If you see any suspicious text appended to the target path, such as “-safe-mode” or “-profile” followed by a random directory, delete this portion of the text, leaving only the path to the Firefox executable (e.g., “C:\Program Files\Mozilla Firefox\firefox.exe”).
Click “Apply” and then “OK” to save the changes to the Firefox shortcut.
For Microsoft Edge:
Right-click on the Microsoft Edge shortcut on your desktop or in the Start menu and select “Properties.”
In the Properties window, go to the “Shortcut” tab and examine the “Target” field.
If you see any suspicious text appended to the target path, such as “–load-extension=…” followed by a random directory, delete this portion of the text, leaving only the path to the Edge executable (e.g., “C:\Program Files (x86)\Microsoft\Edge\Application\msedge.exe”).
Click “Apply” and then “OK” to save the changes to the Edge shortcut.
After completing these steps for the respective browser, proceed to the next stage in the removal process.
Step 5: Reset browser settings
Malicious browser extensions and settings modifications associated with the virus can persist even after removing the malware. To ensure that your browser is clean and secure, it’s essential to reset its settings to their default values. The following instructions will guide you through resetting Google Chrome, but similar steps can be followed for other browsers like Mozilla Firefox, Microsoft Edge, or Internet Explorer.
A. Reset Google Chrome settings
Open Google Chrome and click on the three-dot menu icon in the upper-right corner of the window.
From the dropdown menu, select “Settings.”
In the Settings page scroll down and click on “Reset settings”
Click on “Reset settings”
In the confirmation dialog box, click “Reset settings” to confirm the action. Chrome will reset its settings to default values, removing any malicious extensions, themes, or startup pages.
[Optional] Reset Chrome Sync If you suspect that your Chrome Sync data might be compromised, you can reset it by following these steps:
Visit the Google Chrome Sync settings page: https://chrome.google.com/sync?
Click on “Clear data” and confirm the action in the dialog box.
Resetting your browser settings will remove all extensions, themes, and customizations, restoring the browser to its original state. While this process can be inconvenient, it is necessary to ensure that any remaining malicious elements are eliminated.
B. Reset Mozilla Firefox settings
Open Mozilla Firefox and click on the three-line menu icon (hamburger menu) in the upper-right corner of the window.
From the dropdown menu, select “Help” and then “More troubleshooting information.”
In the Troubleshooting Information page, click on “Refresh Firefox” under the “Give Firefox a tune-up” section.
In the confirmation dialog box, click “Refresh Firefox” to confirm the action. Firefox will reset its settings to default values, removing any malicious extensions, themes, or startup pages.
C. Reset Microsoft Edge settings
Open Microsoft Edge and click on the three-dot menu icon in the upper-right corner of the window.
From the dropdown menu, select “Settings.”
In the Settings page, click on “Reset settings” under the “Reset settings” section.
Click on “Restore settings to their default values.”
In the confirmation dialog box, click “Reset” to confirm the action. Edge will reset its settings to default values, removing any malicious extensions, themes, or startup pages.
D. Reset Internet Explorer settings
Open Internet Explorer and click on the gear icon in the upper-right corner of the window.
From the dropdown menu, select “Internet options.”
In the Internet Options window, go to the “Advanced” tab.
Click on “Reset” under the “Reset Internet Explorer settings” section.
In the confirmation dialog box, check the “Delete personal settings” checkbox and click “Reset.”
After the reset process is complete, click “Close” and restart Internet Explorer.
Step 6: Scan with Malwarebytes
To ensure that your system is free from the virus and any associated malware, it’s crucial to perform a comprehensive scan using a reliable anti-malware tool like Malwarebytes. This step will help detect and remove any remaining threats that may have been missed during the manual removal process.
Click on the “Download” button for the free version of Malwarebytes.
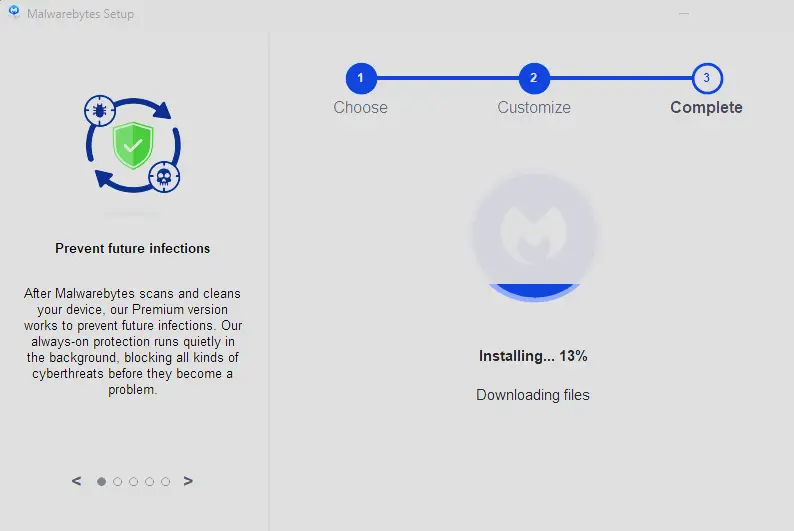
Once the installer is downloaded, double-click on the file to begin the installation process.
Follow the on-screen instructions to complete the installation, accepting the license agreement and choosing the appropriate installation options.
B. Run a scan with Malwarebytes
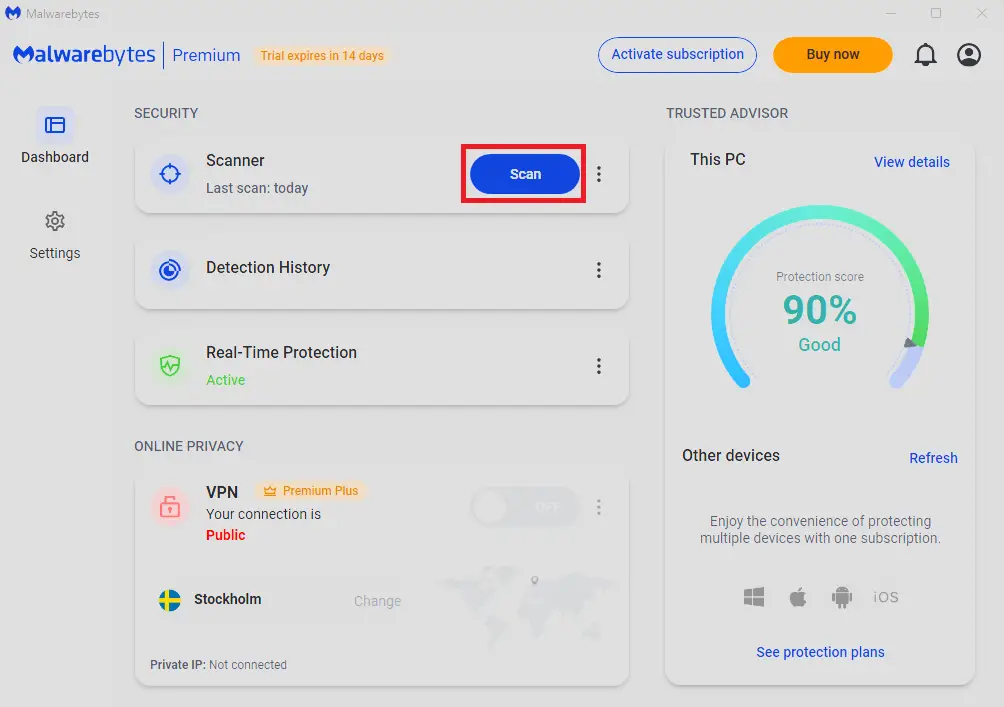
Open Malwarebytes and click on the “Scanner” tab in the left-side menu.
Select “Perform full scan” and click on the “Scan” button to initiate a comprehensive scan of your system.
Wait for the scan to complete. This process may take some time, as Malwarebytes will thoroughly check your system for any malware or suspicious files.
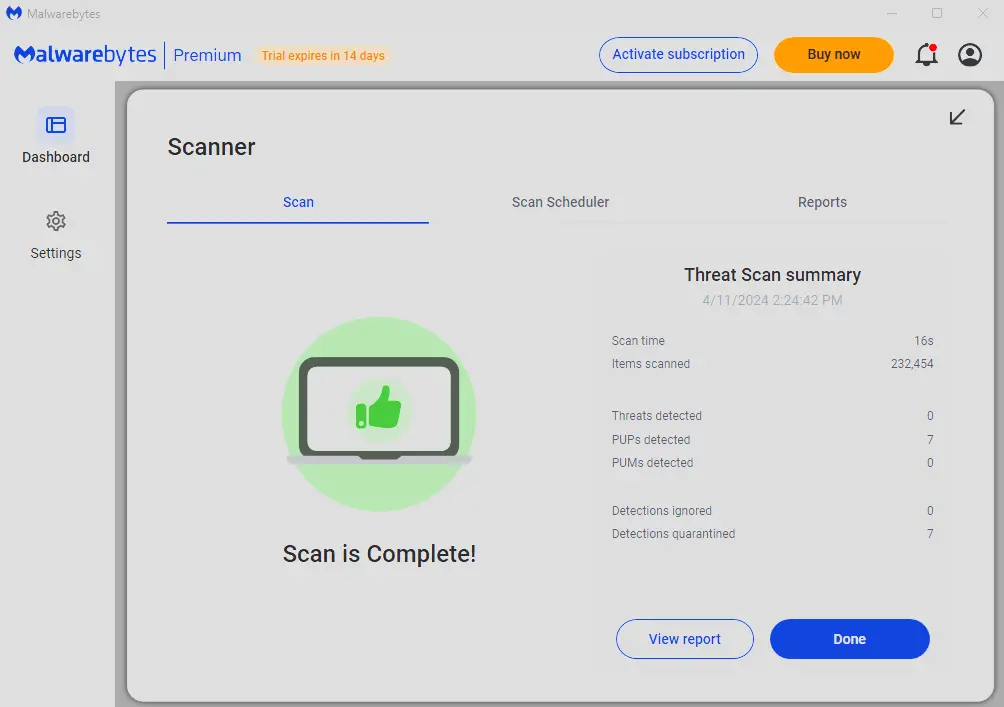
C. Quarantine detected threats
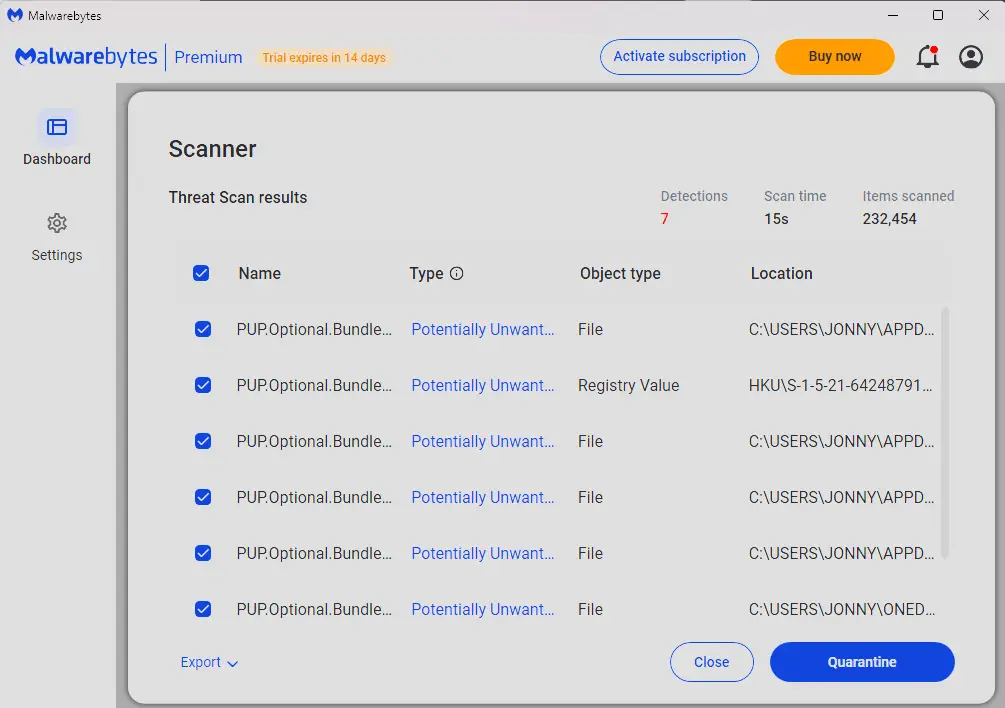
Once the scan is finished, Malwarebytes will display a list of detected threats, if any.
Review the list of threats and select all the items you want to quarantine.
Click on the “Quarantine” button to move the selected threats to Malwarebytes’ quarantine, effectively neutralizing them.
After quarantining the detected threats, restart your computer to ensure that all malicious processes are terminated and any remaining traces of the malware are removed.
Proceed to the next step in the removal process to perform an additional scan using another anti-malware tool for added security.
Step 7: Scan with HitmanPro
To further ensure that your system is free from any remaining traces of the virus and other malware, it’s recommended to perform an additional scan using HitmanPro. This powerful anti-malware tool is designed to detect and remove stubborn threats that may have evaded other security software.
Click on the “Download” button to download the HitmanPro installer.
Once the installer is downloaded, double-click on the file to begin the scan process.
B. Run a scan with HitmanPro
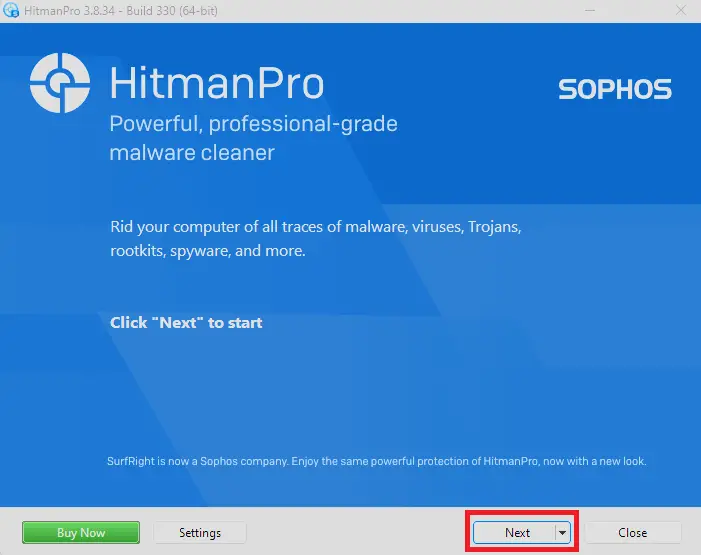
Open HitmanPro and click on the “Next” button to initiate a system scan.
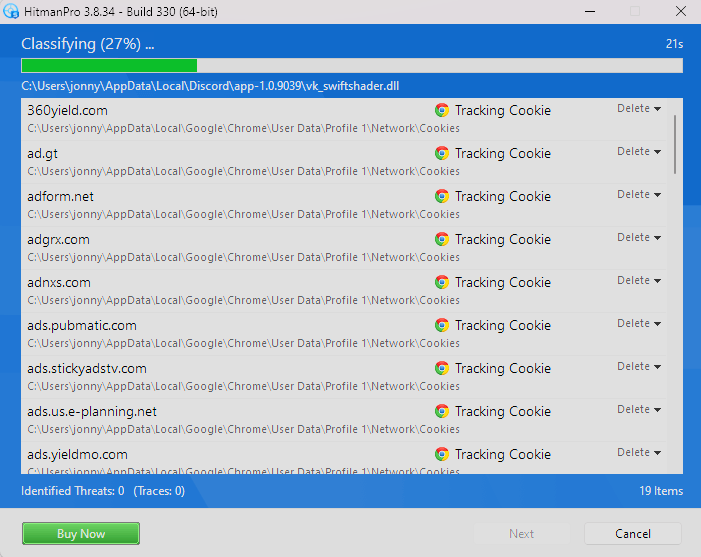
Wait for the scan to complete. HitmanPro will thoroughly check your system for any remaining malware or suspicious files.
C. Activate free license to remove threats
Once the scan is finished, HitmanPro will display a list of detected threats, if any.
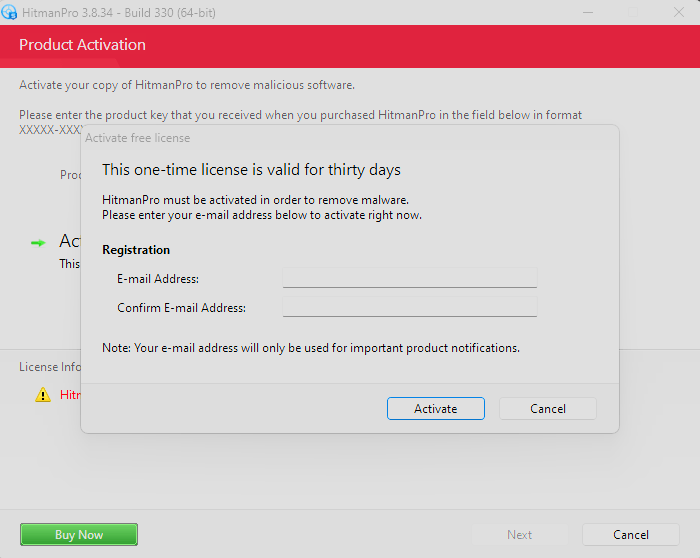
To remove the detected threats, you need to activate the free 30-day trial license.
Click on the “Activate free license” button and follow the on-screen instructions to activate the trial license.
After activating the license, click on the “Next” button to remove the detected threats.
HitmanPro will now remove any remaining malware from your system. Once the process is complete, restart your computer to ensure that all malicious processes are terminated.
Proceed to the next step in the removal process for a final scan using AdwCleaner to remove any leftover adware or browser hijackers.
Step 8: Use AdwCleaner to remove adware and browser policies
The final step in the removal process is to use AdwCleaner, a powerful tool designed to scan for and remove adware, browser hijackers, and potentially unwanted programs (PUPs) that may be associated with the virus. AdwCleaner will also help reset any remaining malicious browser policies.
Click on the “Download Now” button to download the AdwCleaner installer.
Once the installer is downloaded, double-click on the file to launch AdwCleaner.
If prompted by User Account Control (UAC), click “Yes” to allow AdwCleaner to run with administrative privileges.
Read the license agreement and click “I agree” to proceed.
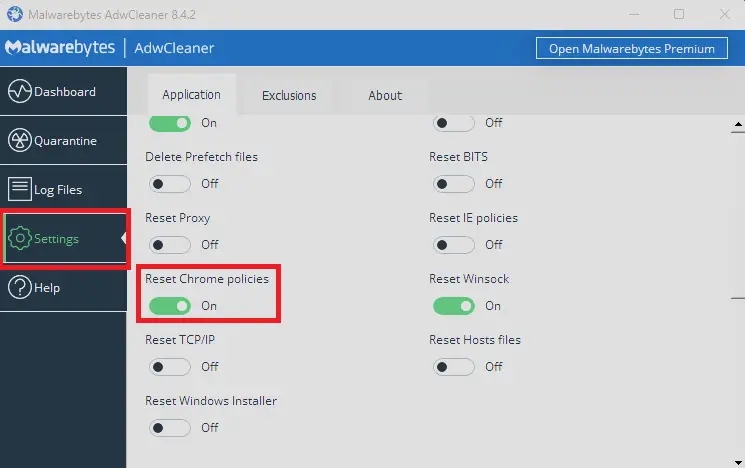
B. Enable Reset Chrome policies
In the AdwCleaner main window, click on the “Settings” tab in the left-side menu.
Under “Reset Chrome policies,” ensure that the option is enabled by checking the box next to it.
C. Run a scan with AdwCleaner
Return to the “Scanner” tab in the AdwCleaner main window.
Click on the “Scan” button to initiate a system scan for adware, browser hijackers, and PUPs.
Wait for the scan to complete. AdwCleaner will thoroughly check your system for any remaining threats.
D. Quarantine detected threats
Once the scan is finished, AdwCleaner will display a list of detected threats, if any.
Review the list of threats and uncheck any items you wish to keep (this is not recommended unless you are certain the item is legitimate).
Click on the “Quarantine” button to move the selected threats to AdwCleaner’s quarantine and reset any malicious browser policies.
After quarantining the detected threats, AdwCleaner may prompt you to restart your computer. Save any open work and click “OK” to restart your system.
Technical Analysis of Adware Webcord
Adware Webcord is a type of adware that inserts unwanted advertisements into web browsers. It is often bundled with free software and installed on a user’s device without their knowledge or consent. The goal is to generate revenue for the adware creator through pay-per-click advertising.
Infection Methods
Bundled with freeware/shareware: Webcord is frequently distributed by being included with free software downloads. Users unwittingly agree to install it when quickly clicking through installation steps.
Exploits browser vulnerabilities: The adware can take advantage of security holes in out-of-date web browsers to install itself. Drive-by downloads from compromised websites can infect systems.
Symptoms Once installed on a PC or mobile device, Adware Webcord exhibits the following behaviors:
Injects ads into browser: Pop-up ads, banners, text link ads, and in-text hyperlink ads are overlaid on webpages, even if the site should not contain advertising. Ads are often for dubious products/services.
Redirects web searches: Attempts to search using the browser’s address bar or search engine are redirected to a different search provider or advertising pages. The browser’s default search engine may be changed.
Installs browser extensions: Unwanted toolbars, extensions or plugins may be silently added to the browser. These allow the adware to control the browsing experience.
Slows system performance: The constant ad-serving activity consumes system resources, slowing down infected PCs and draining mobile batteries faster. Browser speeds are reduced.
Conclusion
By completing all the steps in this comprehensive guide, your system should now be free from the virus and any associated malware, adware, or browser hijackers.
To maintain a secure system, consider implementing the following best practices:
Keep your operating system and installed software up to date with the latest security patches.
Use a reputable antivirus and anti-malware tool, such as Malwarebytes Premium, and keep it updated.
Be cautious when downloading and installing software, especially from untrusted sources.
Regularly backup your important files to protect against data loss in case of future infections.
FAQ
Q: Will following this guide remove all instances of the virus from my system? A: Yes, by carefully following each step in this guide, you should be able to remove the virus and its associated components from your system. However, if you continue to experience issues or suspect that your system is still infected, it’s recommended to consult with a professional technician or seek further assistance from reputable online resources and forums.
Q: Can I skip some of the steps in this guide? A: It’s strongly recommended to follow all the steps in the order presented to ensure that your system is thoroughly cleaned and all traces of the malware are removed. Skipping steps may lead to an incomplete removal and potential reinfection.
Q: Do I need to purchase the full version of Malwarebytes or HitmanPro to remove the Trojan? A: No, the free versions of Malwarebytes and HitmanPro are sufficient for detecting and removing the virus. However, purchasing the full versions of these tools can provide additional features and real-time protection against future threats.
Q: What should I do if I’m unsure about removing a detected threat? A: If you’re unsure whether a detected item is a legitimate file or a threat, it’s best to research the file name or consult with a professional technician before removing it. In most cases, it’s safer to remove the suspected threat, as leaving it on your system may lead to further issues.
Q: How can I prevent future infections? A: To minimize the risk of future infections, practice safe browsing habits, avoid downloading software from untrusted sources, keep your system and software up to date, and use reputable antivirus and anti-malware tools. Regularly backing up your important files can also help protect against data loss in case of an infection.
Q: What if I need further assistance with removing the Trojan or have other questions? A: If you need further assistance or have additional questions, consult with a professional technician or seek help from reputable online resources and forums, such as:
Remember, dealing with malware can be challenging, and it’s always best to seek professional help if you’re unsure about any step in the removal process.